How to Take a Screenshot on Windows 10 – Are you worried about taking the clear picture of your screen or else looking for a right tool to take pictures of your Laptop or Desktop? Then you have come to the right. Yes, you can get the number of ways to take pictures of your screen or screenshot on your Windows 10 Operating System. Many Windows users do not know how to take a screenshot on their Operating System and use some tool to take the picture from their screen. Yes, tools help you to take screenshots but you can also find the shortcut keys to take screenshots on your Windows 10 Operating System. Microsoft has provided a feature to take screenshots on latest versions of Windows Operating System.

Follow the complete guide to know the shortcut keys and the steps to take screenshots on your Windows Operating System easily.
5 Ways to Take Screenshot on Windows 10 Operating System
#1 By using PrtScn Key or CTRL+PrtScr
Many users do not observe all the keys on the Keyboard provided. If you observe you can see a Key at the right of your keyboard as PrntScr which is used to take screenshots of your Laptop Screen or a Desktop Screen. Simply click the key PrntScr or else Ctrl+PrntScr to take the Screenshot of your screen. The picture will be saved on your clipboard then open in paint and then save the file on your hard disk.
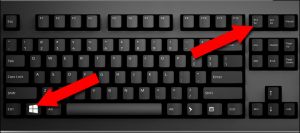
#2. By Using Windows + PrtScr

You can use Windows + PrtScr keys to take the Screenshot of your PC/Laptop and then you can easily save it on your hard disk. The file will be saved as Screenshot (Number).png on your device. All the files or pictures are saved and then you change the picture type according to your wish later when you are free.
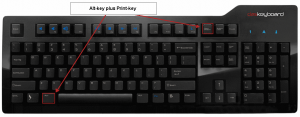
#3. By Using Alt + PrtScr

You can also use Alt + PrtScr to take the capture of your Laptop or Desktop Screen. All the pictures are saved to the Clipboard and then you can open it in the paint and then you can make changes accordingly.
If you are using the Keyboard which has Fn key or the Function key then you can use all the above methods by using the Function additionally as mentioned.
- Fn + PrtScr, Fn + Windows + PrtScr, Fn + Alt + PrtScr : – These are the additional keys to take the Screenshots by using the Function keys on your PC/Laptop.
- These are the standard keyboard shortcut keys to capture the picture you need to your Desktop or Personal computer.
- But, some of the keyboards do have proper function of PrtScr by using the additional keys. So better to follow the other methods mentioned.
#4. By Using Windows +Shift + S (Windows 10)
If you are a Windows 10 user then you can use Windows + Sift + S keys to take a capture of your Windows Screen on your PC/Laptop.
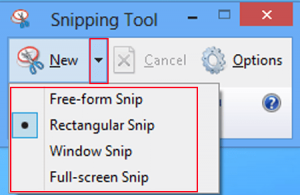
#5. By Using Snipping Tool

Snipping Tool is the best application to take a screenshot without any help of keys provided. You can simply open the application and then choose to take a new capture from your Windows screen.
So, these are the shortcut keys and application on Windows 10 Operating System to take a Screenshots on your PC/Laptop. Choose any method to take Screenshots on your Laptop Screen else use Snipping Tool as it provides the best captures.


