Restore Windows 10 To An Earlier Date – Yes, we need to create a restore point whenever you try to update your Windows Operating System manually because it takes to you to the point where you started updating. Many users use restore point if they find any glitches in between the updating of Windows Operating System and it makes easy to go to the point where you started updating your Windows Operating System. If you find any issues or glitches between the update then just go to restore point. If you do not know how to access the restore point then just simply follow the article now.
Microsoft has given an inbuilt feature called creating a restore point for Windows 10 Operating System whenever you try to set settings on your Windows PC/laptop. Even if you want to create a restore point then it is also available for all users and also in all versions of Windows Operating System. Restore point is mainly used whenever you try to boot your Windows OS and if it fails in between. So here are the simple steps to access the restore point on your Windows Operating System.
Restore Windows 10 To An Earlier Date within Operating System
Follow these steps completely and carefully implement on your Windows Operating System.
- Open your Windows Operating System and then log in using System Administrator Account.
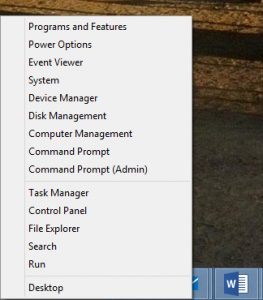
- Now use Power Menu by pressing Win + X on your desktop and then click on Control Panel option. You can also navigate to control panel in the other way.

- In Control Panel window, set the view by in Category and then click on System and Security.
- In System and Security, you can see File History option. Click on File History.
- In File History window, you can see Recovery option at the bottom left corner of the window. Click on Recovery.

- In Recovery window, Click on Open System Recovery and then System Restore wizard. Then Click Next.
- Now, you need to choose the restore point from the list available and then click on Next.
- Now, you need to confirm the restore point and then click on the Finish button.
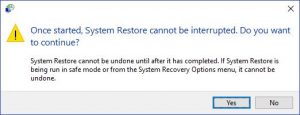
As you click on Finish, you can see a warning box as Once Started, System Restore Cannot be interrupted. Do you want to continue? If you want to continue then you can click on Yes else you can click on No. Now, you need to wait for your Windows 10 Operating System confirmation as the restore point is created. After creating the restore point your Windows Operating System will restart automatically and then you can start using your Windows Operating System safely.

By clicking No, you are not creating any restore point on your Windows Operating System. But you can use this method to create a restore point if you wish to do it later. Sometimes it becomes difficult to remember all the steps right? So I suggest you bookmark this page so that you can easily navigate to this page from the bookmarks bar if you want to create a restore point on your Windows 10 Operating System.
